Conlang Tools & Documentation
*** REALLY BIG WIP, MIND THE MESS ***
This is a resource list-slash-guide for how to create usable elements for your conlangs and document then with various programs. This guide is not for how to create or develop conlangs themselves - there are loads of good resources online for that already, which I will link to - this is specifically for how to use and document your conlangs on your device(s) of choice so that the development process is much easier and flexible to your needs. Additionally, it is geared towards enabling the use of your conlang in its own script in other places, such as art programs, 3D modeling, websites, text editors, and so on.
This guide is especially for any conlangs with one or more of the following properties, which I'll be referring to by their number order here throughout the rest of the page:
- Unique alphabet design (also known as conscripts), especially ones with syllabaries, logograms, or diacritics AND especially any glyph that would require more than one key input to type
- More glyphs than there are typeable keys on your keyboard
- Number system(s) that aren't base-10
- Writing direction other than left-to-right, top-to-bottom
- Is partially or wholly a cipher language
- Any other unusual or aesthetic features that require special markup or tools to document them the way they are intended to look/function
If your conlang does not have any of these traits, this guide will likely still benefit you in some way. I have geared this to those that have one or more of these things, though, as these traits can make them difficult to document in a digital repository or create usable resources for them that encompass their full intended functionality as a language.
Some introductory things to note:
- I'm an amateur-hobbyist conlanger without much formal knowledge or experience in linguistics. These are just the tools I ended up using over the years because I couldn't find very many good ones specifically for documenting or using conlangs with unique alphabets.
- This guide is geared primarily towards the following things:
- Basic to intermediate skill level with programming, as that is my level. If you are an advanced conlanger and/or programmer, then I do hope this is also helpful for you. If you have suggestions for resources or improvements to this guide whatsoever, feel free to contact me.
- Favoring compatability across multiple device types + flexibility with using and documenting your conlang(s) to your needs, so it does entail tolerance or desire to manually customize the way you document your language as opposed to relying on programs that organize it for you. I will demarcate differences in resources between rigidity to flexibility for those that have a preference for preset organization, customizable organization, or anything in-between.
- I do not claim these to be the best methods for accomplishing all conlanging goals, they're just the ones that worked best for mine; your experience level, degree of interest in conlanging, and conlang properties will affect what works best for you.
- The devices I use are a windows 10 laptop and an android phone, so not all of these resources may be available for other platforms like Mac/iOS/Linux/Chrome/etc.
1. MAKING FONTS
BEST FOR TRAITS:
1
This is pretty intuitive, but what's important to note is how fonts can be used to store more glyphs than what can be conventionally typed on a QWERTY or related keyboard. If your conscript has more glyphs than your primary language(s), this is the best way to bundle the entire conscript in a single usable format - just keep track of what unicode characters you assign to your glyphs. In my experience, it doesn't really matter whether you use PUA code points, extended latin, or anything else. For a conlang like this to be typeable in an organic way, it will also require a transliterator, which we will get into soon.
Usability: ⭐⭐⭐⭐⭐
Functionality: ⭐⭐⭐⭐⭐
Skill required: ⭐⭐
Easy to learn: ?
Flexbility: ⭐⭐⭐⭐⭐
Requires other programs?: No
Personal exp. with it: ⭐⭐
Free, downloadable. I haven't used this extensively, but it does work really well and it has a shitton of features. Your best option for exporting smooth-looking fonts without paying a dime.
Usability: ⭐⭐⭐⭐
Functionality: ⭐⭐⭐⭐
Skill required: ⭐
Easy to learn: ⭐⭐⭐⭐
Flexbility: ⭐⭐⭐
Requires other programs?: No
Personal exp. with it: ⭐⭐⭐⭐
Free, online. You can create custom fonts and design letters however you'd like using some basic building blocks, including storing glyphs in other character sets like extended latin. Fonts can be made private and downloaded as .ttf files.
Usability: ⭐⭐⭐⭐
Functionality: ⭐⭐
Skill required: ⭐
Easy to learn: ⭐⭐⭐⭐⭐
Flexbility: ⭐⭐
Requires other programs?: No
Personal exp. with it: ⭐⭐⭐
Free or paid, online. The free version is very limited. You can only store characters in alphanumeric character slots, and you have to draw the glyphs you want to use in a separate sheet file. On the other hand, it's a quick and dirty way of making a font if it has the same or fewer number of glyphs than the standard English alphabet. If you're looking to save time or energy and your conscript is small enough to fit in Calligraphr's provided glyph spots, then it's worth a shot or two.
2. TYPING LAYOUTS
BEST FOR TRAITS:
1, 2, 3, 5
Usability: ⭐⭐⭐
Functionality: ⭐⭐⭐
Skill required: Varies
Easy to learn: ⭐⭐⭐
Flexbility: ⭐⭐⭐
Requires other programs?: No
Personal exp. with it: ⭐⭐⭐
Desktop (Win10). Free software.
This is the tool I once primarily used so that I could type letters in the extended character sets where font glyphs were stored, but I've had a range of issues with this one before on Windows 10, so YMMV. You can export custom keyboard layouts and install them to your computer.
CHAINING DEADKEYS
If your conlang requires more than 2 consecutive deadkey inputs to type a letter, you have to manually edit the .msklc file to include every step of the input chain, as MSKLC's front end doesn't natively support deadkey chaining. You can export it and it'll still work, though.
Michael Kaplan, the creator of the software himself, has a guide on how to do this, and
this blog post further explains how the method works.
Beware, as this method is where I've had the most problems with this program. It's technically worked, but I've had so much weird behavior from keyboards made via this method and not enough information or experience to deduce how or why such bugs occurred, so I unfortunately don't have much advice to give if it is faulty for you as well. Said weird behavior includes disappearing keyboard layouts from the language bar and sporadic inability to add or remove layouts from the system. If your conlang is in need of more keystrokes, you should consider one of the other resources below to avoid headache and save some time.
Custom Python/JavaScript cipher
Usability: Varies
Functionality: Varies
Skill required: Varies
Easy to learn: Varies
Flexbility: ⭐⭐⭐⭐⭐
Requires other programs?: Varies
Personal exp. with it: ⭐⭐⭐⭐
If programming is daunting to you, I promise this is simpler than it sounds. I've had to make simple scripts in Python and JavaScript for transliterating phonetic spellings of conlang text into the appropriate conlang font glyphs because of the recurrent issues I've had with MSKLC keyboard layouts, so this is the route to go for conlang typing if MSKLC fails or daunts you. It's significantly easier to get it to work.
There's no one way to make a program and it will all depend on how your conlang works, so this will require some basic Python/JS knowledge to customize such a program to your needs. (If it's JavaScript, it can be incorporated easily into websites.) A JavaScript version can be used with TiddlyWiki, which I'll get into soon.
3. USING FONTS
BEST FOR TRAITS:
1
Although most basic applications on Windows computers like Notepad, Microsoft Word, WordPad, and MS Paint can use any font you've installed on your system, I'm not including them here because they either have limited use cases, less conlang-helpful functionality than the resources I'm about to list, and/or have issues that inhibit conlanging. Notepad can only apply one font style at a time to each file and Microsoft Word documents containing custom fonts won't display the fonts if you send them to another device that doesn't have that font installed. You can work around this by converting them into .pdfs, but this is really inconvenient if you ever have to make changes to the document and resend or reupload it somewhere where the font will display correctly.
Usability: ⭐⭐⭐⭐
Functionality: ⭐⭐⭐⭐
Skill required: ⭐
Easy to learn: ⭐⭐⭐⭐⭐
Flexbility: ⭐⭐⭐⭐
Requires other programs?: No
Personal exp. with it: ⭐⭐⭐
Mobile app (Android). Free with ads. This is a pretty simple image editor for Android, but more importantly, it allows you to use custom .ttf fonts for text.
4. DOCUMENTING CONLANGS
BEST FOR TRAITS: 1, 2, 3, 4, 5, 6
Now we come to the meat of this guide - using and documenting your conlang using all the moving parts we've created so far. There are several methods for doing this and certainly more than I'm even aware of, but these are the ones I have the most familiarity with.
Usability: ?
Functionality: ?
Skill required: ?
Easy to learn: ?
Flexbility: ⭐⭐⭐
Requires other programs?: No
Personal exp. with it: ⭐
Free, desktop software. Windows/Mac/Linux.
I haven't really used this personally for conlang documentation, but others have, and I've heard generally really good things about it. If you're looking for something that has more rigid preset structure and thorough conlang documentation features out of the box, this may be a good option for you. The only reason I haven't used this is because I found and optimized TiddlyWiki for personal conlang documentation long before this, and am too comfortable with the flexibility of that to switch to this. That being said, there are some really useful features in PolyGlot that take a fair amount of work to emulate in TiddlyWiki (such as auto-generating words based on conjugation and declension rules, statistics reports, and an IPA converson tool), so it has the advantage of being immediately at your disposal to build up your conlang dictionary with powerful features the moment you open it.
The other weaknesses to this program insofar as my own personal conlanging needs are the following things:
- No mobile equivalent or ability to sync/access a file across devices
- Requires separate transliterator software to type in your conlang if it has traits 1, 2, 3, or 5
TiddlyWiki addresses these weaknesses, but it's much less structured out of the gate and requires some work to craft it to your needs. If you like that sort of thing, then this is the method for you. If you don't, or don't have a need for a cipher (if any) to be bundled with the same interface as your dictionary, then PolyGlot is the better option of the two.
Usability: ⭐⭐⭐⭐⭐
Functionality: ⭐⭐⭐⭐⭐
Skill required: Varies
Easy to learn: ⭐⭐⭐
Flexbility: ⭐⭐⭐⭐⭐
Requires other programs?: Yes
Personal exp. with it: ⭐⭐⭐⭐
The important benefits of TiddlyWiki when set up as how I'm about to describe, and why I favor it over anything else, are the following:
- Can be accessed, viewed, and edited from any device
- Can simultaneously serve as a transliterator and a dictionary, allowing you to type in your conlang from any device without requiring any other separate dependencies, and henceforth document your conlang with exactly the same functionality across both desktop and mobile instances
- Highly customizable in appearance and functions to individually suit a person's needs for their conlang; can be arbitrarily simple or complex
- Supports HTML/CSS and JavaScript for further customization
INSTALLING FONTS
There are two methods of incorporating fonts into TiddlyWiki.
Local file reference
Desktop-only. Does not translate across devices, but faster and easier to set up. (WIP)
Hardcoded URI reference
Desktop + mobile. More work intensive, but worth it if you want to use it on mobile devices or share it with other people without the need for them to download the font separately. This method is also necessary for the main guide that I'm about to get into after this section. Unfortunately this method requires being done on desktop first, then hosting or sharing the TiddlyWiki instance to mobile afterwards; I've had issues trying to do this the other way around.
For this to work, the font file has to be in .woff format. There are a number of online converters for that if you need to convert it from .ttf or .otf.
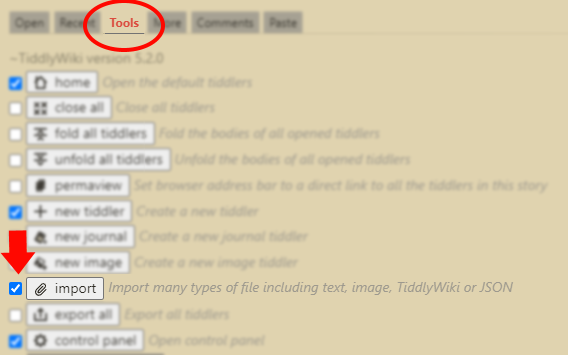
- Select the Import button on your wiki. If this button is not shown above the search bar on your wiki, you can toggle it by navigating to the Tools tab beneath the search bar and checking the box next to its name.

- Import the .woff file. If it isn't already, the Type should be set to appplication/font-woff. The body text should display "This tiddler contains binary data" when this is selected.
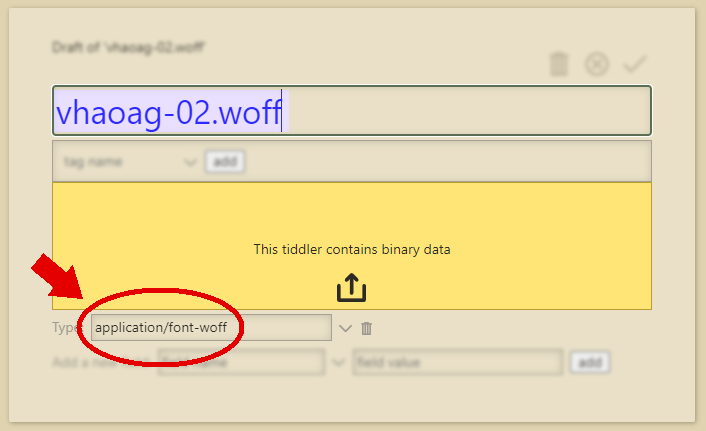
(This is the name of the font I created for my conlang; you can give this tiddler any name you want to fit yours.)
- Copy the following text into another tiddler, give it any title you want, and tag it as $:/tags/Stylesheet:
@font-face {
  font-family: "CONLANG_NAME";
  src: url(<<datauri "CONLANG_NAME.woff">>) format("woff");
  }
  .class-to-use-the-font {font-family: "CONLANG_NAME";}
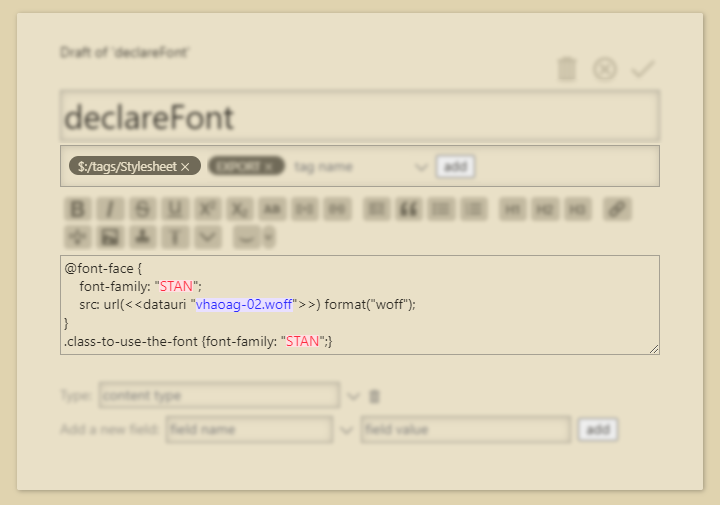
The tiddler should look something like this after you save it. If it spits out a giant ass hyperlink, then you've done it right:
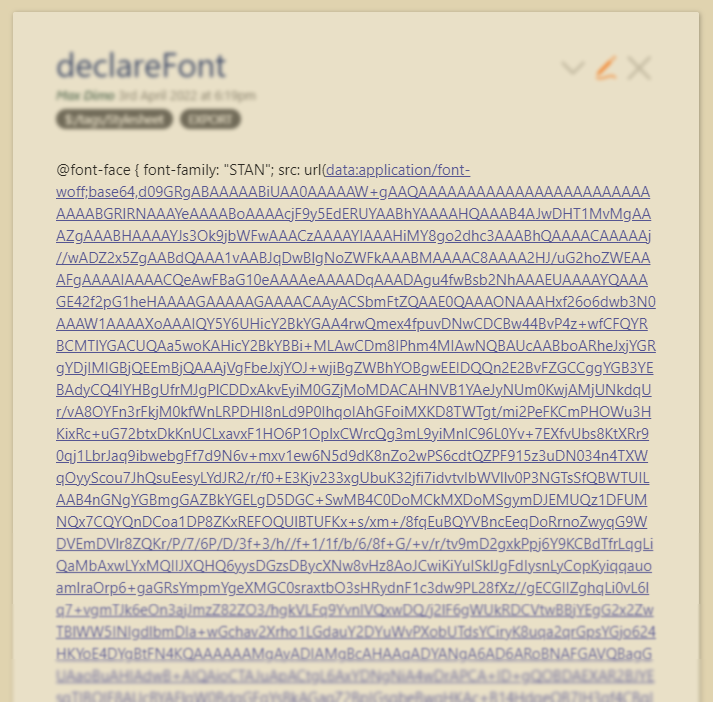
Congratulations! Now you have a hardcoded font style that will show up on any device you use to view your wiki, including instances without an internet connection (the reason I favor this method versus referencing the font file from any external source). To use the font in other tiddlers, there are several ways to invoke this style, but the inline method is what I primarily use, which can use any further CSS styling you desire:

IN-WIKI TRANSLITERATOR
The following section details how to set up a TiddlyWiki instance with relatively low effort that can be accessible and editable across desktop and mobile, and use both your conscript font and conlang transliterator to full capacity across any device you access it with. It will require the following things in addition to TiddlyWiki:
TiddlyWiki Cloud is a tool that enables editing and saving changes to TiddlyWiki files hosted on Dropbox, so this method does require an internet connection to use if you want your edits to the wiki to be saved, but it's free and doesn't require hosting the wiki on a public platform.
If you only need the cipher offline and don't need device syncing, then I suggest using instead an offline mobile TiddlyWiki editor like Noteself, Tiddloid (both are for android), or Quine 2 (iOS, not yet tested). I don't at this time know how to set up a local network that enables device syncing without requiring an internet connection, but there are many ways to achieve that with TiddlyWiki, so anyone with experience in that area may find it easier to accomplish than I.
For the transliterator, you're going to need to make the following tiddlers:
- Hardcoded URI .woff conlang font
- JavaScript cipher
- Text entry & translation page
- Input text dump (leave blank)
- Output text dump (leave blank)
- Stylized output text dump
Assuming you already have the hardcoded font, the next thing you need is the cipher.
JavaScript Cipher
This is the only area that will require you to have basic JavaScript knowledge to cater it to your specific conlanging needs. This is a sample of what that might look like:

- This is a JavaScript object with key/value pairs, which is being used here in a conceptually similar way as Python dictionaries. The key is the first value listed in each pair, where we can see that English letters have been assigned. The value is what that letter input will be changed to in this transliterator, shown in quotation marks. The values must correspond to the glyph where the correct conlang letter is assigned in your font, so they'll look strange here without the font applied but will display as intended on the front-end. This is why it's important to keep a list ahead of time for where each glyph in your conlang font is stored; it will make building the transliterator much easier.
Depending on the complexity of your conlang, you may need to create several of these JavaScript objects to be used in a consecutive fashion.
- Once your object(s) are made, create a new tiddler, set its type to application/javascript, and insert the following text in the body section:
/*\
title: $:/core/modules/macros/CONLANG_NAME_CIPHER.js
type: application/javascript
module-type: macro

YOUR_DESCRIPTION_HERE

\*/
(function(){

/*jslint node: true, browser: true */
/*global $tw: false */
"use strict";

exports.name = "CONLANG_NAME_CIPHER";

exports.params = [];
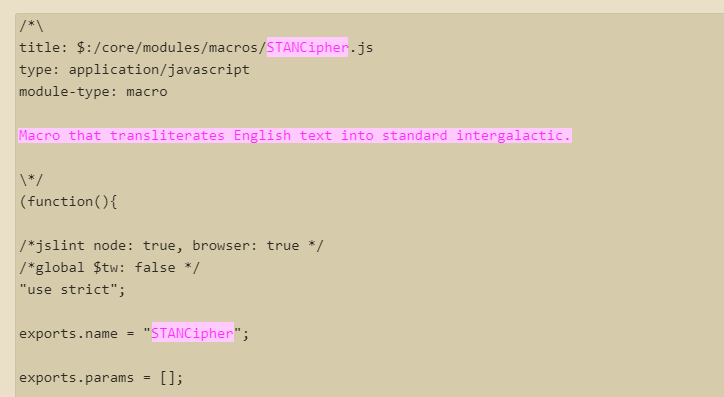
After that, insert the object(s) you created beneath this text.
- The exact syntax of the cipher function itself will vary depending on your needs, but the basic syntax is as follows, which should be placed below your objects:
exports.run = function() {
		let tiddler = this.wiki.getTiddler("INPUT_TEXT_DUMP");
		let translated = tiddler.fields.text;

		for (const key in YOUR_CIPHER) {
			 if (translated.includes(key)) {
			  translated = translated.replace(new RegExp(key, "g"), YOUR_CIPHER[key]);
		  } else {

		}
	  }

  return translated;
};

})();
If you have multiple cipher objects, you can simply repeat the second block and order them in the order they're intended to be run. The INPUT_TEXT_DUMP mentioned should be created as a separate tiddler and left blank; this is the tiddler that will be modified in your transliterator and stores your inputted text to be ciphered. Make sure it starts with a $:/ because I've had weird behavior trying to get this function to read tiddlers that don't have this.
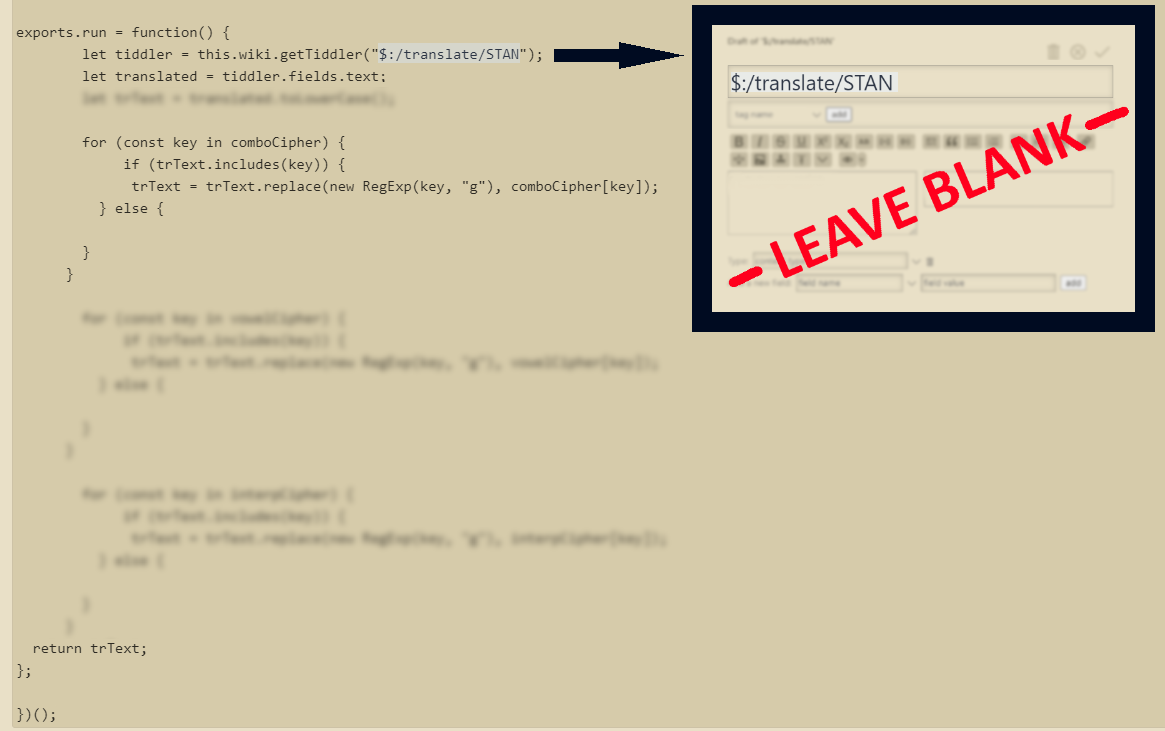
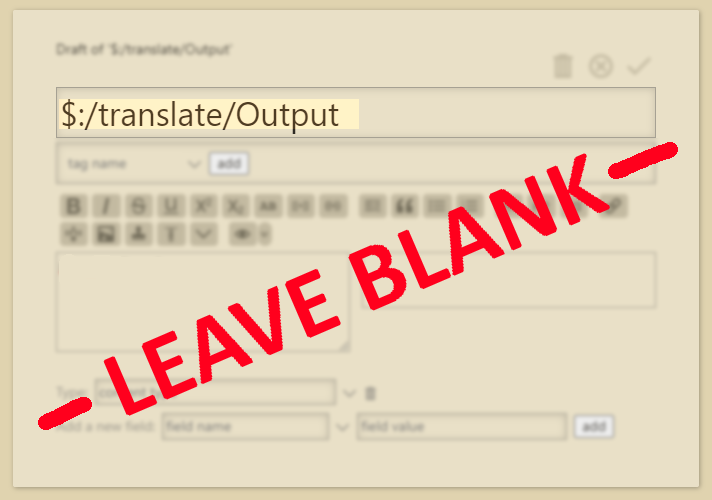
- Next, create your raw output tiddler and leave it blank;
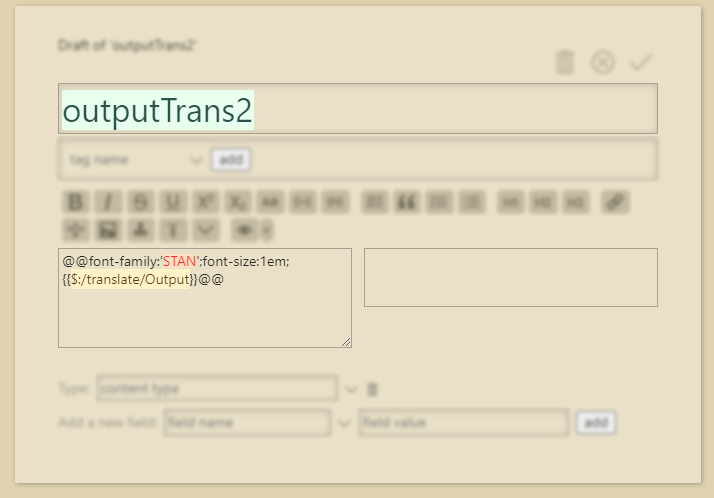
- Create the stylized output tiddler. This is what will be shown on the front-end transliterator. It transcludes the value of the raw output tiddler wrapped around an inline CSS style to display it in your conlang font.
- Finally, it's time to create the front-end transliterator.
\define trns()
<$action-setfield $tiddler="OUTPUT_TEXT_DUMP" $field="text" $value=<<CONLANG_NAME_CIPHER>>/>
\end

<$edit-text tiddler="INPUT_TEXT_DUMP" tag="textarea" default="Type here..."/>

<$importvariables filter="[[$:/core/modules/macros/CONLANG_NAME_CIPHER.js]]">

<$button actions=<<trns>>>
TRANSLITERATE
</$button>

</$importvariables>

|! <center>Result</center> |
| {{OUTPUT_TEXT_STYLED}} |
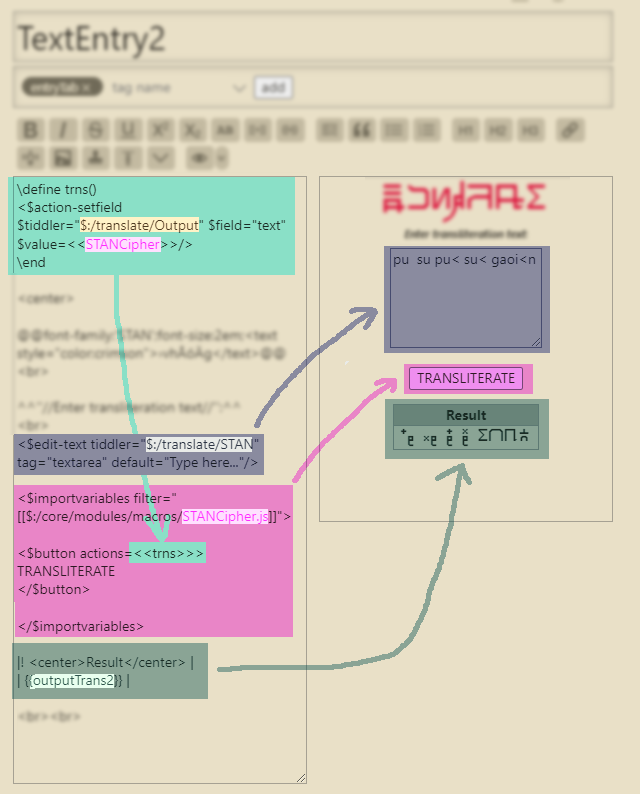
The top box is clickable and can be typed in, which will be your input text to be ciphered. The button will execute the JavaScript cipher macro and automatically update the output box to display the ciphered text.


